
Create Dynamic Range in Excel
For example, in Excel you can easily fill a drop-down list with data using a range. If data is added over time, the range must be adjusted manually. If there are not often changes, you can do this manually. If the range changes regularly, it is more convenient to use a dynamic range. The length and/or width of the range will automatically adjust as you add values. Such a dynamic range can be performed in two ways. If you work with a somewhat newer version of Excel, you can use tables. This works easier. If you work with an older version of Excel, then a dynamic range with formulas possible, but is a little more complicated.
Dynamic range via a table
For the sake of convenience, in this example, we will assume a customer base. We can assume that there are regular changes here. If things go well, new customers will be added regularly.

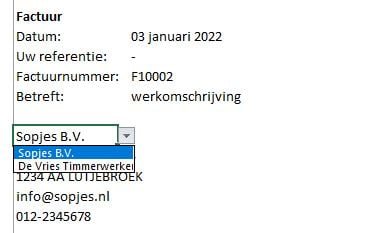
You can select the relevant debtor via a drop-down list, after which all other details are entered.
Convert customer file to table
We are going to convert the customer base from a range to a table. We do this by selecting the data including headers (range A3:G5). Go to the tab Insert the group Tables and click Table. Or use the key combination Ctrl+L.
Create Named Range
The next step is to put the customer names in a named range. We do this by selecting all the data in the first column of the table. To do this, click at the top of the header cell. The cursor changes to an arrow pointing downwards. If you click, all items in the relevant column are selected.
In the ribbon, go to the Formulas tab the group Defined Names and click Define name.
A new window will open called New name.
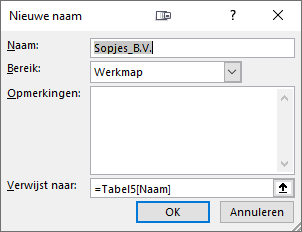
Fill in the input field Name: an easy-to-remember name for your scope (e.g. selClientname).
Then click on OK and the defined name is saved.
Make preset list dynamic
To create a drop-down list, select the cell in which you want the list to appear (for example, B17). In the ribbon, go to the tab Facts the group Data Tools and click Data Validation. A new window will open.
under the tab Settings choose you at To allow: for “List” and at Source: enter the range (see image below).
Forgot the name of the named range? Select the input field Source: and press the F3 function key. A new window will open with all named ranges. This also prevents the chance of typos.
If you now add a new customer to the customer database, it will automatically be added to the drop-down list.