Automation Garbage Bin Reminder Home Assistant
This article will show you how to create an automation in Home Assistant to receive reminders to take out your bins based on data from HVC Group Sensors. This automation will send you a notification on your mobile device to remind you of the bins that need to be collected.
Steps
Installation of Home Assistant
If you haven't installed Home Assistant yet, follow the official installation guide on Home Assistant website.
Install HVC Group Sensor Component:
The HVC Group Sensor Component is available as a custom component for Home Assistant. To install it, you'll need to download the component and add it to your Home Assistant setup. You can install the component via HACS in Home Assistant or manually.
Install via HACS (recommended)
- Make sure that HACS is installed so you can easily manage and track updates.
- Search for “HVCGroep”.
- Click on the Install button below the found integration.
- Configure using the configuration instructions below.
- Restart Home Assistant.
Manual installation
- Download the HVC Group Sensor Component from GitHub.
- Place the downloaded file in the “custom_components” folder of your Home Assistant configuration.
- Make sure your configuration file (configuration.yaml) contains the correct data to connect to HVC Group's API and enable the sensors.
- Restart Home Assistant.
To use this component in your installation, add the following to your configuration.yaml-file:
sensor: - platform: hvcgroep postal code: 1234AB house number: 1 resources: - organic waste - plastic - paper - residual waste - cleaning
Save your configuration file and restart Home Assistant.
Add automation to Home Assistant
Adding an automation in Home Assistant can be done in two ways:
- Via the visual editor.
- By modifying automations.yaml
Add automation via the visual editor
In Home Assistant, go to Settings Automations & scenes

Then click on the button at the bottom right of your screen Add automation.

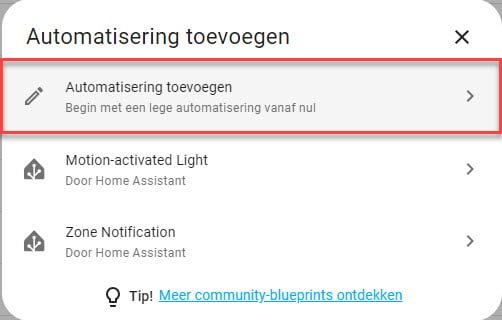
A new window will open with three options:
- Add automation
- Motion activated light
- Zone Notification
We choose the option Add automation.
Triggers
First we create a Trigger. Triggers are the events that Home Assistant listens for to determine when to run an automation. You can think of Triggers as the start button for your automations.
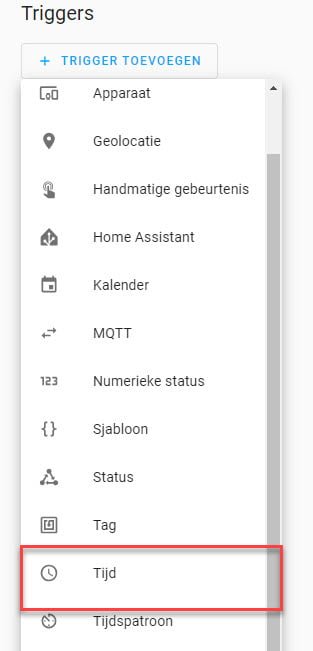
There are different types of Triggers within Home Assistant, such as:
- Time Trigger: This is one of the most common triggers. This allows you to trigger an automation at a specific time of day, such as 7:00 AM.
- Status Trigger: This allows you to trigger automations when the status of a specific device or entity changes. For example, if a motion sensor detects movement, it can trigger an automation.
- Event Trigger: You can trigger an automation when a specific event occurs, such as pressing a button on a remote control.
- Sun Trigger: You can trigger automations based on the time of sunrise or sunset at a specific location.
- Calendar Trigger: You can trigger automations based on events in your calendar, such as appointments or reminders.
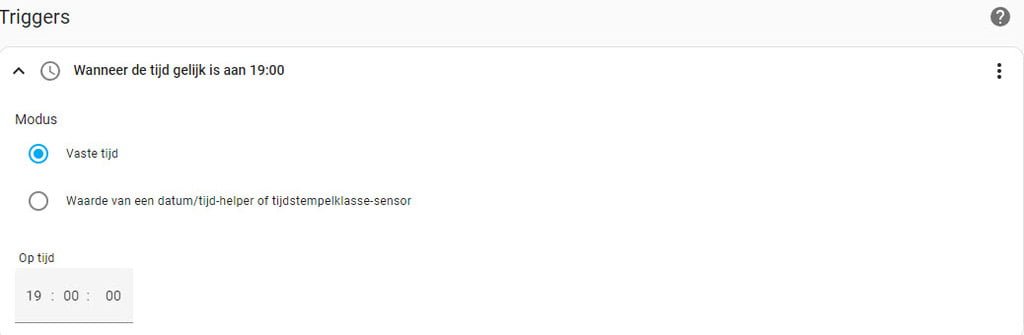
In this case we always want to have the automation carried out at 7:00 PM. So we choose the Time Trigger
Set the Time Trigger Mode to Fixed time. Refill On time 7:00 PM (or other desired time).
Conditions
The next step is to set the conditions. Conditions are specific rules or criteria that must be met before an automation is executed. Conditions allow you to more precisely control the execution of automations and activate them based on certain conditions. They act as filters that determine whether an automation should continue or be paused based on the current state of your smart devices or other variables. Some different conditions are:
- Status of an entity: You can set a condition based on the current state of a specific entity. For example, you can create an automation that only runs when the temperature in a room rises above a certain threshold.
- Time condition: You can add conditions based on the current time. For example, you can create an automation that only activates during the night (between certain hours) or during work hours.
- Status of different entities: Conditions can depend on the status of multiple entities. For example, you can set a condition to only run an automation if both the front door and motion sensors are activated.
In this case we use the status of different entities. If the status of one of the entities contains the text “Tomorrow”, the condition is met and the action may be performed.
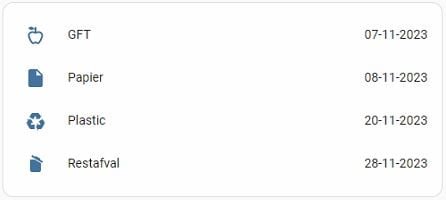
We use four different entities in the HVC Group Sensor Component:
- sensor.hvc_groep_blue_bak_paper
- sensor.hvc_groep_grey_bin_residual waste
- sensor.hvc_groep_groen_bin_gft
- sensor.hvc_group_plastic_and_packaging
If one of these entities has a status of “Tomorrow”, the action may be performed.
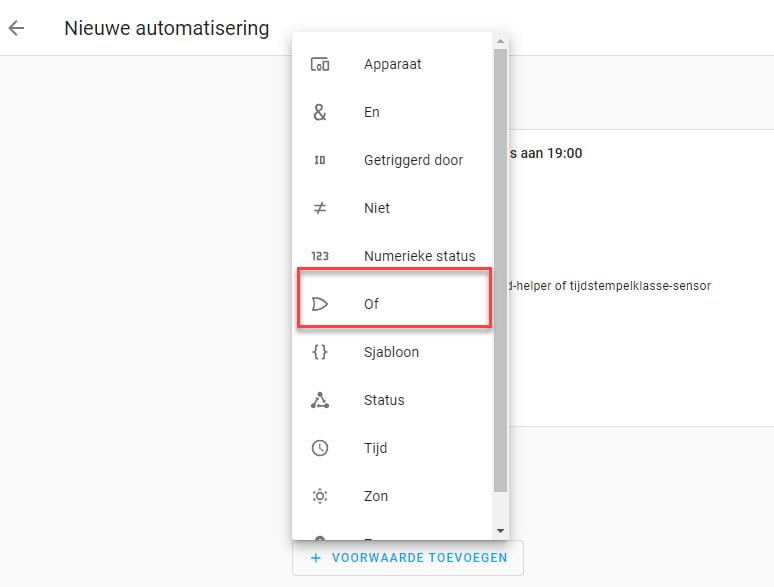
Press the button Add condition and then choose Or.
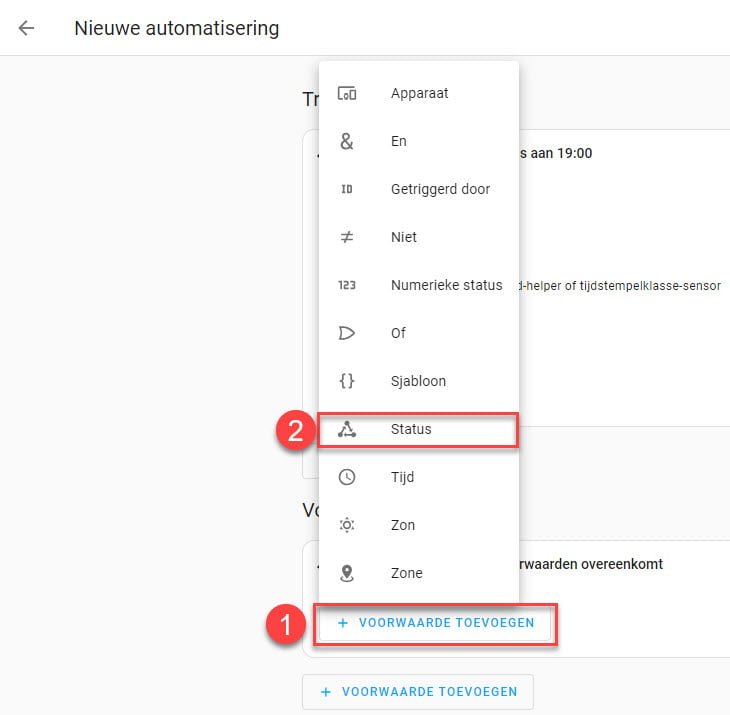
Then click on the button Add condition in the context of the Or condition. Choose the condition Status.
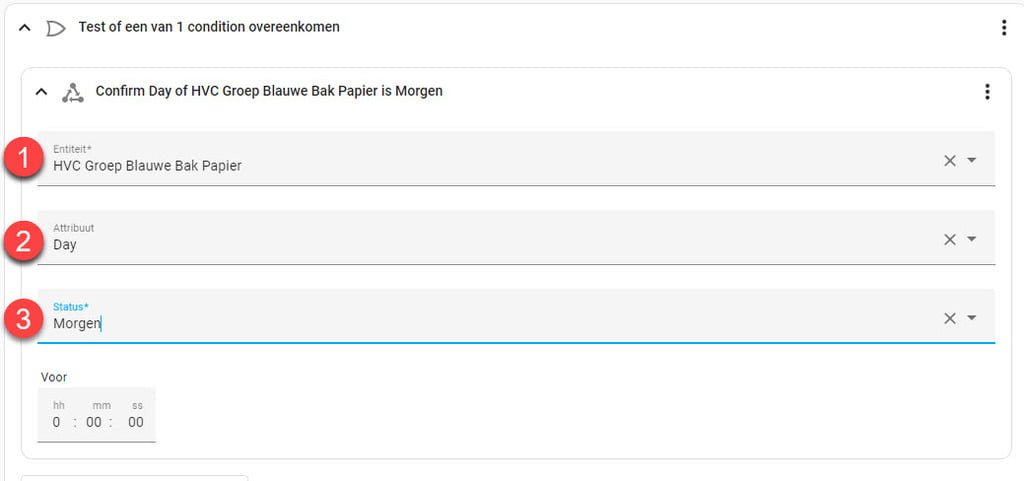
- Fill in the field Entity “hvc group” and you will receive a list of all entities that match your search query.
- Click on the desired entity.
- Choose at Attribute for Day.
- Refill Status Tomorrow
Repeat this step for all four above sensors.
Take action
The final step is to have the action carried out if the above conditions are met.
We want a message to be sent to a mobile device if the conditions are met. We use the action for this Service. You can use this to send a personalized message to, for example, your phone (if you have installed the Home Assistant app on it).
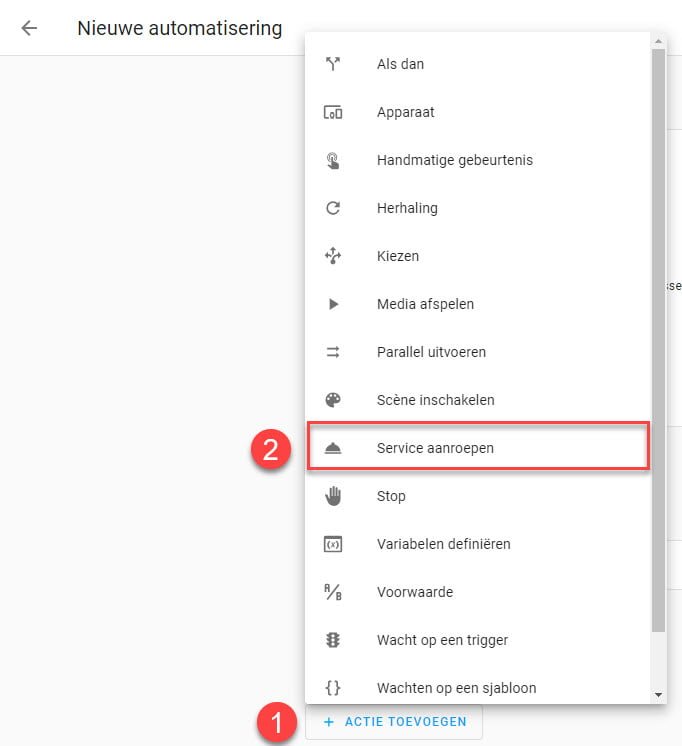
Press the button Add action and then on Call service.
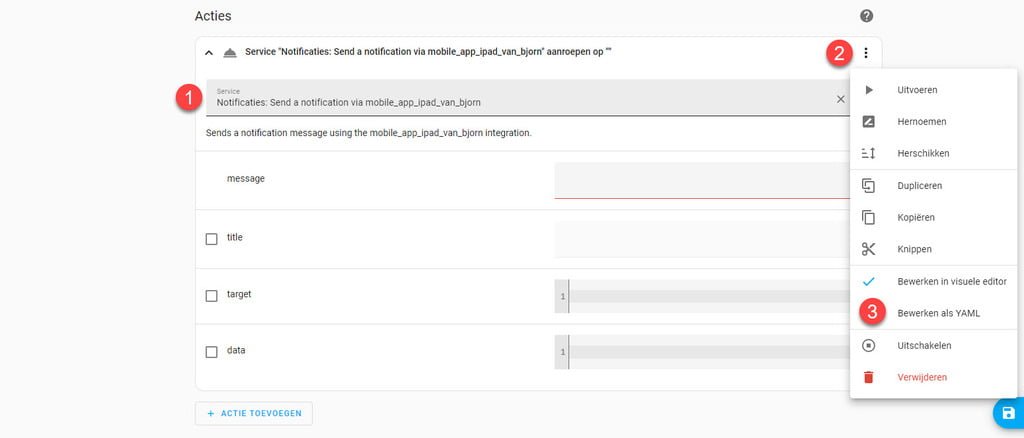
Fill in the field Service “Notifications” and select the device on which you want to receive the notification.
Because we want to indicate which garbage bin and on which date based on a template, we cannot use the visual editor. For this we need to edit the configuration in yaml. Templates are not (yet) supported in the visual editor.
To do this, click on the three dots at the top right in the context of the Service promotion. Then choose Edit as YAML.
Add YAML to service action
Add under line dates: Add the code below in the YAML editor:
message: |- {% if 'Tomorrow' in states.sensor.hvc_groep_GREY_BIN_RESTALFAST.state %} Set gray bin to {{ states.sensor.hvc_groep_GREY_BIN_RESTALRUP.state.split('Tomorrow ')[1] }} {% endif %} {% if 'Tomorrow' in states.sensor.hvc_groep_groene_bak_gft.state %} Set green bin to {{ states.sensor.hvc_groep_groene_bak_gft.state.split('Tomorrow ')[1] }} {% endif %} {% if ' Tomorrow' in states.sensor.hvc_groep_Blue_bak_paper.state %} Set paper bin to {{ states.sensor.hvc_groep_blauw_bak_paper.state.split('Tomorrow ')[1] }} {% endif %} {% if 'Tomorrow' in states. sensor.hvc_groep_plastic_en_pakket.state %} Set plastic bin to {{ states.sensor.hvc_groep_plastic_en_pakket.state.split('Tomorrow ')[1] }} {% endif %}
Repeat this step if you want to send the message to multiple mobile devices.
Press the button Save to save the automation and give it a clear name.
pantoprazole 40 mg tablet
pantoprazole 40 mg tablet